Inventory Display
1. Introduction
An inventory manager oversees the procurement, storage, and distribution of medical supplies and equipment.
It tracks stock levels, manage orders and suppliers, organize storage, maintain accurate records, and ensure compliance with safety standards and budget constraints.
It is crucial in ensuring that essential resources are available for patient care while optimizing efficiency and cost.
2. Display

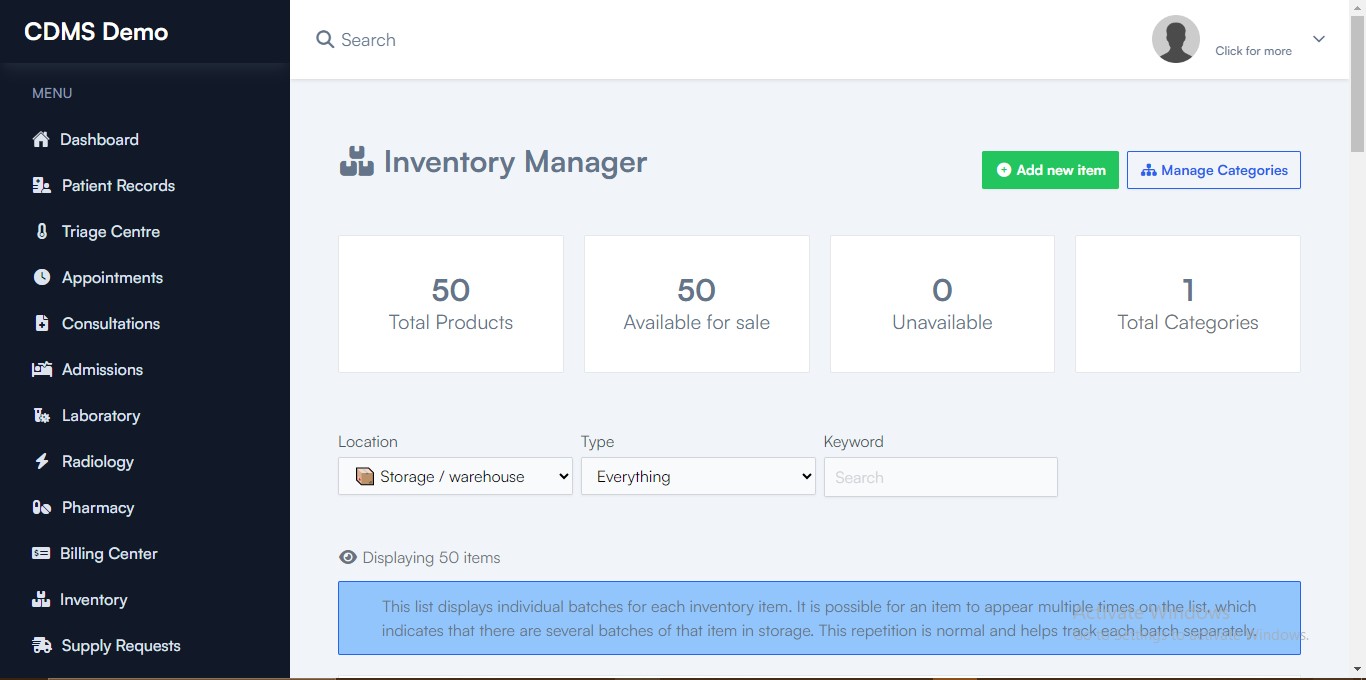
Upon arriving at the inventory manager page, you will see Products:
- Total Number
- Available for Sale
- Unavailable
- Total Categories
Just below these four cards, you can perform searches using three methods:

- Location: Enter the branch you want to inquire about.
- Type: Select from options such as Drugs, Consumables, or Services.
- Keyword: Enter any relevant terms related to the offerings at the facility.
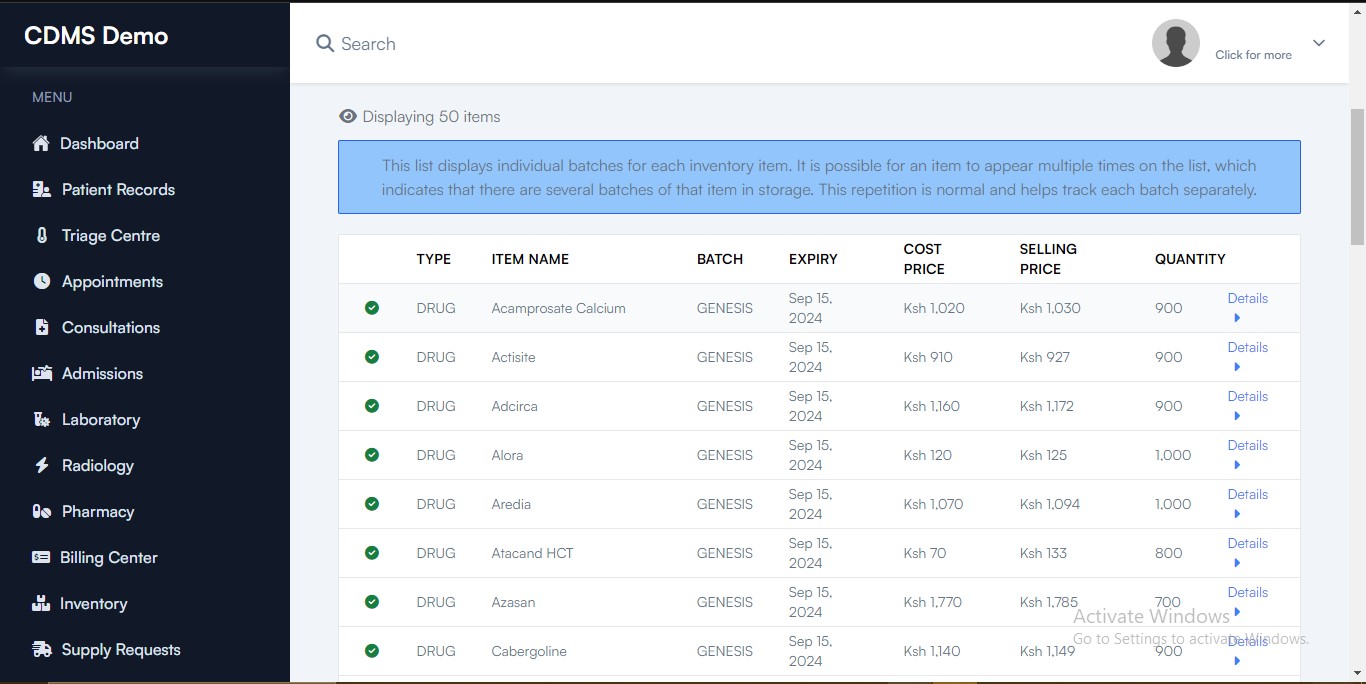
Below the searches discussed is the display. It displays the items being searched in a table.

Table explained
- Type: Reflects the type selected in the search type option mentioned earlier.
- Item Name: The name of the item.
- Batch: The batch number or identifier for the item.
- Expiry: The expiration date of the item.
- Cost Price: The purchase cost of the item.
- Selling Price: The price at which the item is sold.
- Quantity: The amount of the item available in stock.
The type displayed on the table will depend on the selection made in the search type option.
3. Details
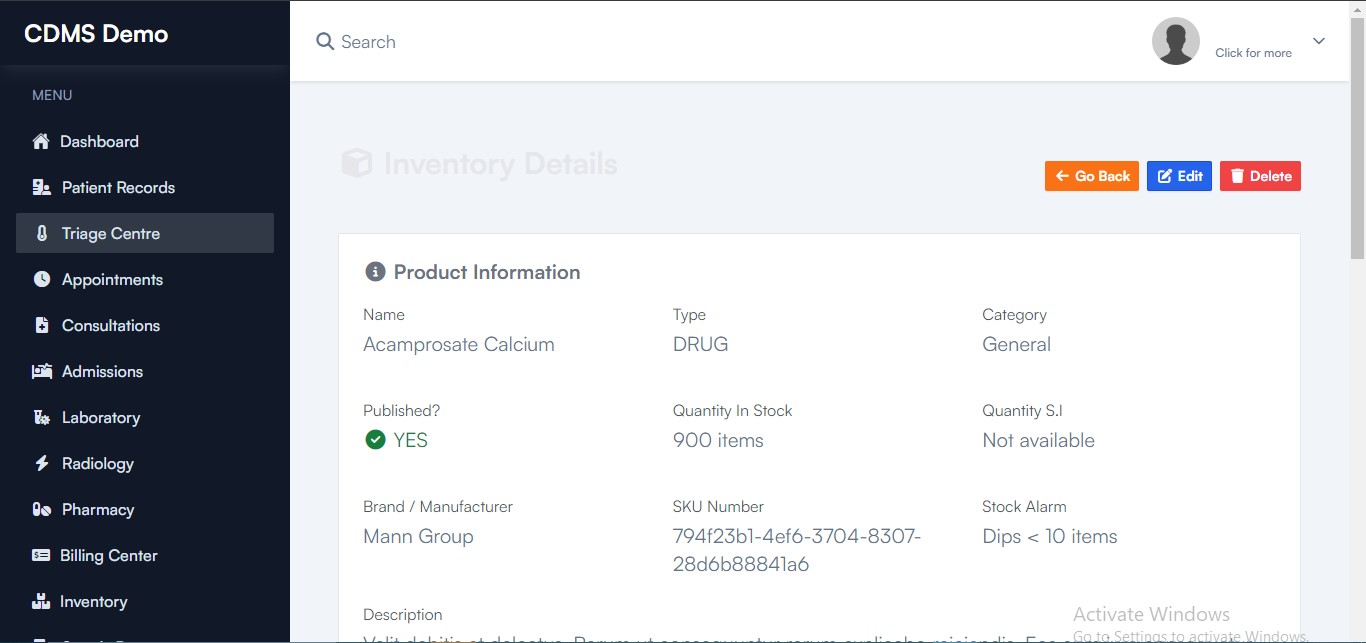
The "Details" link is located at the far right of each row in the table. Clicking it will take you to the Inventory Details page for the specific item.

It displays :
i.Product Information
General details about the item.
ii.Batches
Information about different batches of the item.
Here, there are 2 buttons worth noting:
Receive Stock
This button is used to receive stock for the item and will take you to the Refill Stock page.
On this page, you will find:
- Product Details and Count Card: Displays the product information and current stock count.
- Quantity Card: Provides a field to enter the quantity of stock received.
- Batch number and expiry tracking Card: Allows you to input the batch number and expiration tracking details.
- Supporting Documents Card: Lets you provide information about any supporting documents related to the item.
Finally, click the green "Save Refill" button to complete the restocking process.
Recall Batch
This button is used to remove or retrieve products from distribution or sale due to issues that could affect safety, quality, or compliance.
Clicking it will take you to the Recall Inventory page, where you can enter details such as the quantity recalled, the person recalling the batch, and the reason for the recall. Once the information is filled in, press the green "Confirm Recall" button to complete the process.
iii.Pricing and Profit Margins
Details on the cost, selling price, and profit margins.
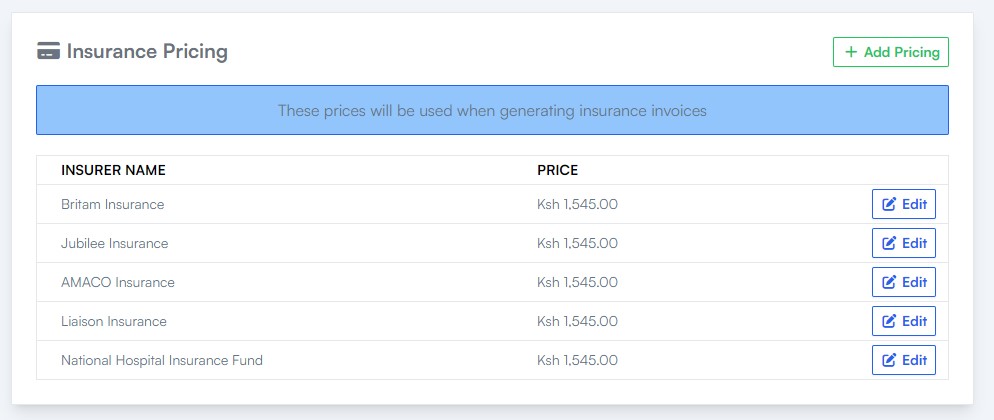
iv.Insuarance Pricing
Here, you can add and manage pricing information related to various insurance coverages. This is done through the intuitive interface featuring an "Add Pricing" button and a detailed form for entering pricing details.


Adding Pricing Information
Navigate to the Insurance Pricing Section:
Locate and click on the "Add Pricing" button.
Display the Form:
Clicking the "Add Pricing" button will display a form.
Fill Out the Form:
Select Insurance.
-
Select Insuarance: Choose the appropriate insurance type from the dropdown menu.
-
Price: Input the corresponding price for the selected insurance type.
Save Changes.
After filling out the form, click the "Save Changes" button to store the new pricing information.
Use the "Edit" button to make changes to the insurance details previously entered.
v.Procurement Pricing
Details on the pricing and costs associated with procurement.
4. Other buttons on details page
You can edit the item by clicking the "Edit" button or delete it by clicking the "Delete" button.
Once an item is deleted, it cannot be retrieved, so please proceed with caution.
You can click the "Go Back" button to return to the Inventory Manager display page.